Finally, Nebamun himself! This is the most famous of the Nebamun murals and shows him hunting in the marshes. He is standing up in a papyrus boat, spearing fish and throwing sticks at birds. Again, Nebamun’s life is shown to be utterly perfect. The weather is glorious. His adoring wife and daughter are with him. He is catching fish and fowl left right and centre.
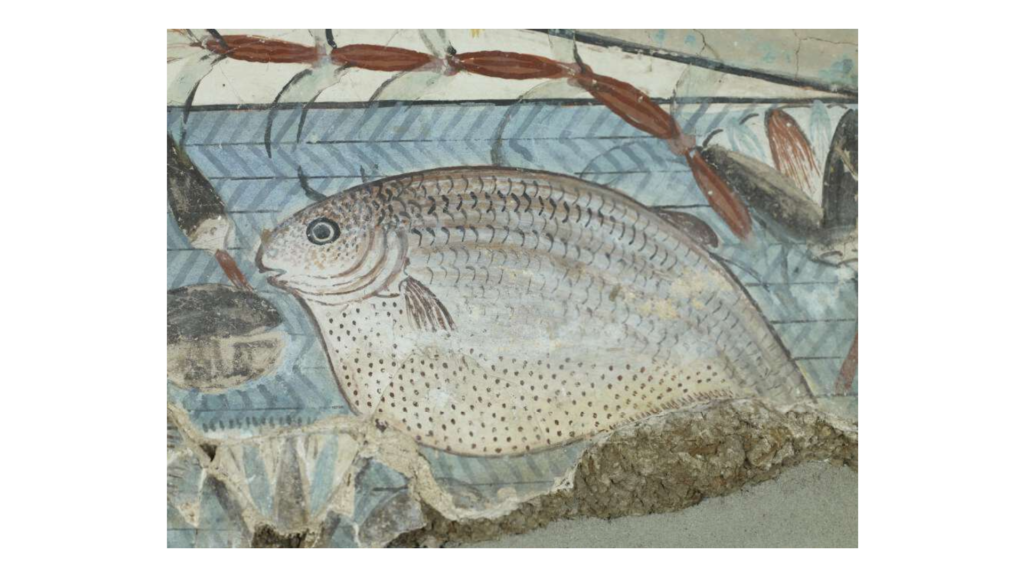
Look how skilful the artwork is. I love the expression on the face of this fish.
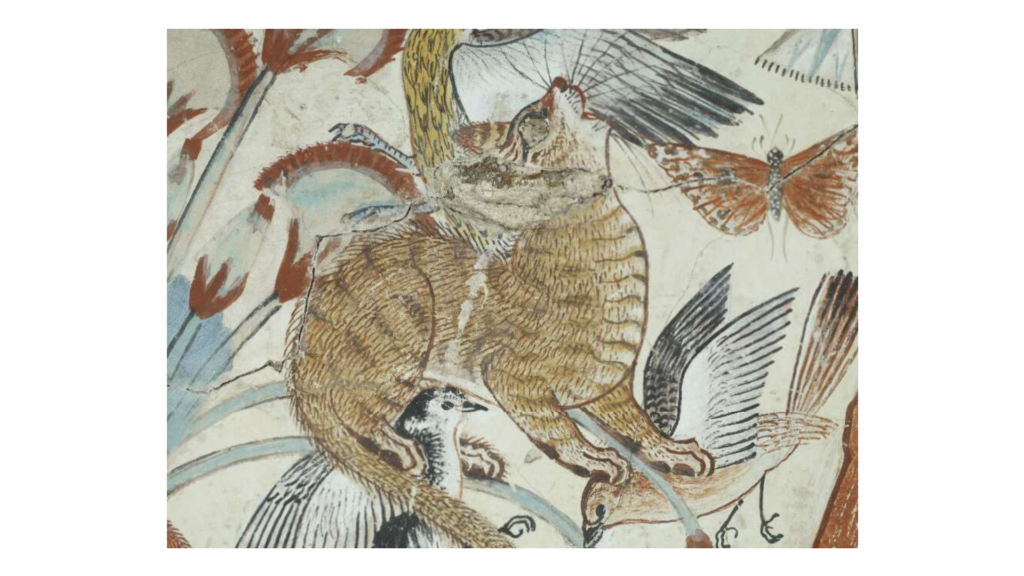
The eye of Nebamun’s ginger cat was decorated with a splodge of real gold. Lean in close and you can still it glinting.
Remember ‘Belzoni the Great’, the circus strongman who brought the head of Ramesses II back to England? He brought back hundreds of other artefacts, too, including these paintings from the tomb of Nebamun.
Ancient Egyptian craftsmen painted beautiful scenes all over the walls and ceilings of their most important tombs, then sealed them shut. The paintings were intended not for human eyes but for the Egyptian gods and for the spirit of the dead person. Belzoni did not care about that. He and his men used saws and chisels to rip great chunks out of the walls of Nebamun’s tomb chapel.
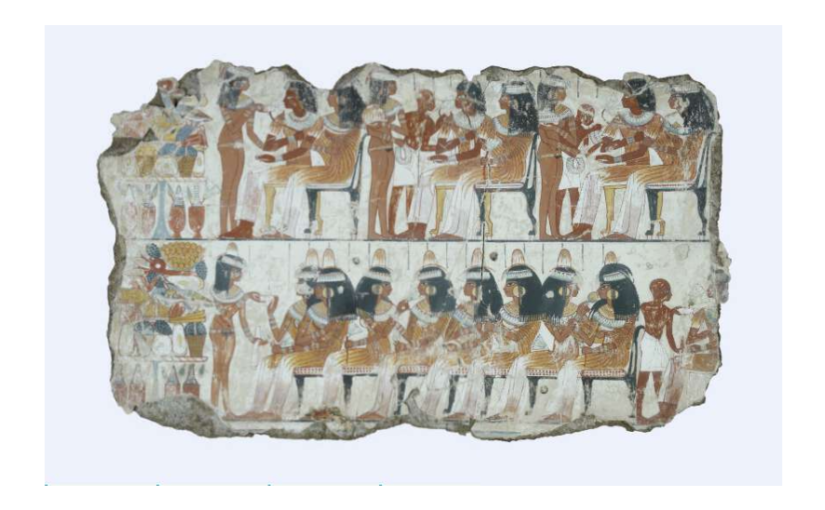
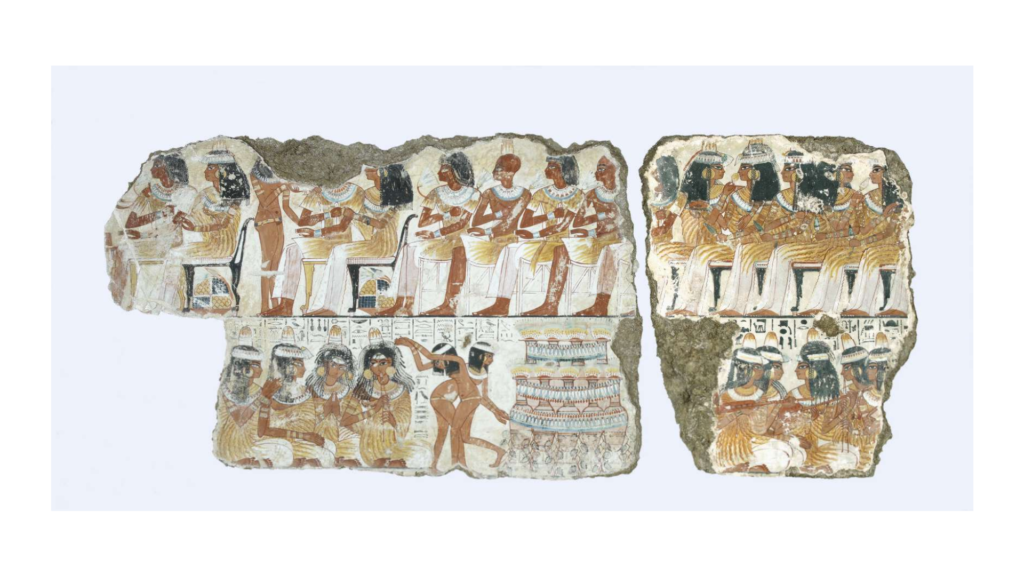
These colourful pictures of Nebamun’s life show him living a happy life, healthy, wealthy and wise. Today’s scene depicts a fabulous banquet with well-dressed guests, piles of food, skilful musicians and saucy dancers. Nebamun and his wife were on the far left of this scene, but that part of the painting is now lost. That’s what happens when you tear enormous chunks out of a three-thousand-year-old plaster wall.
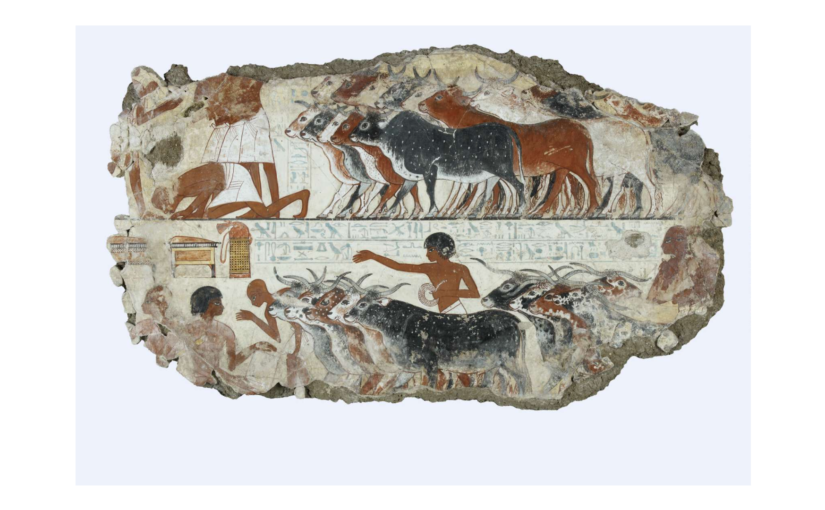
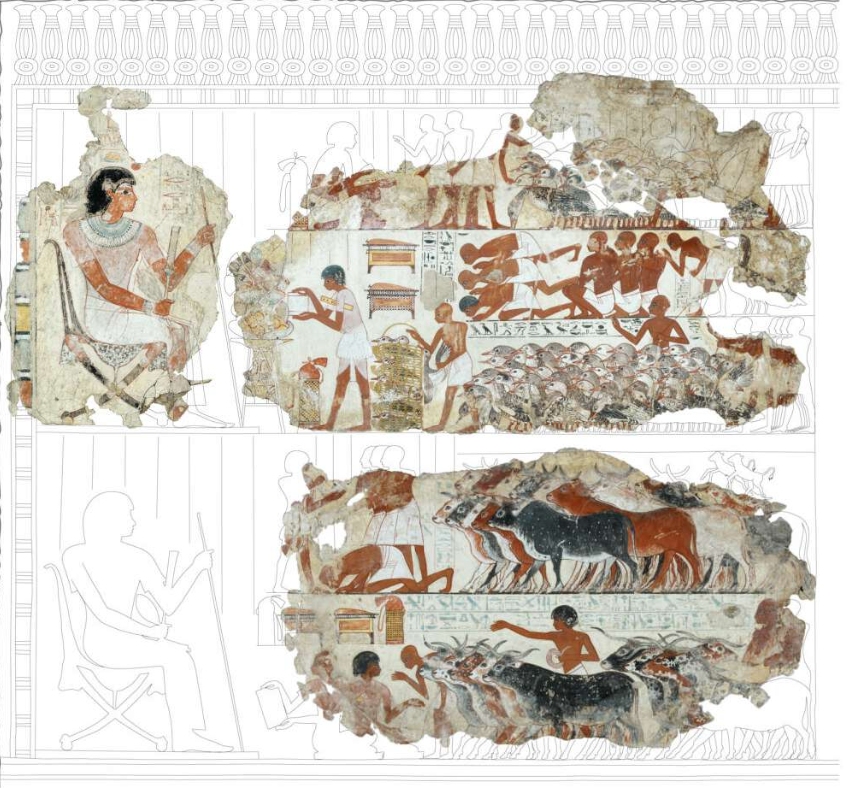
This painting shows Nebamun’s herders bringing the cows for counting. Like all tomb paintings, the ones in this tomb chapel show the owner as healthy, wealthy and wise, and generally living his best life.
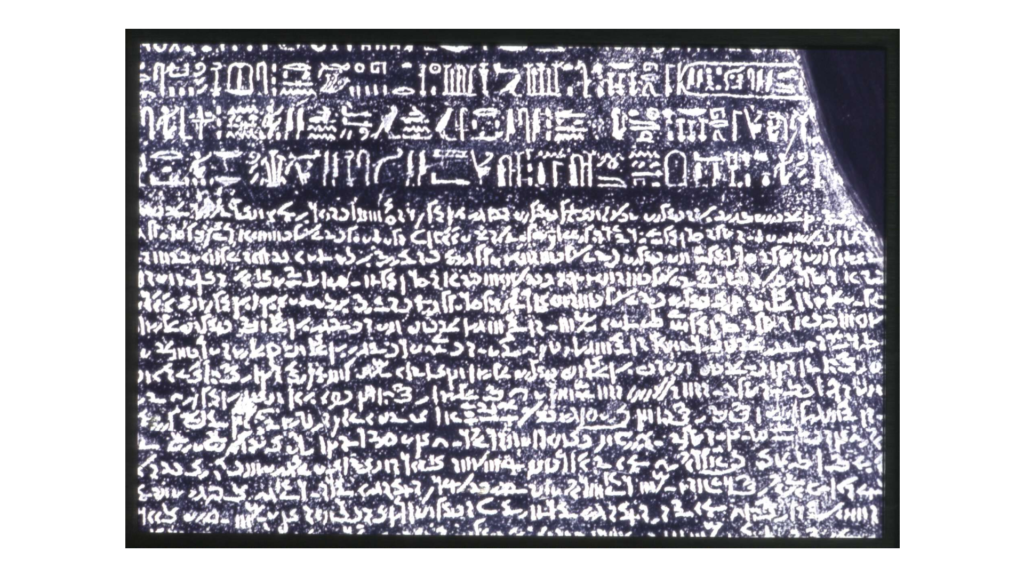
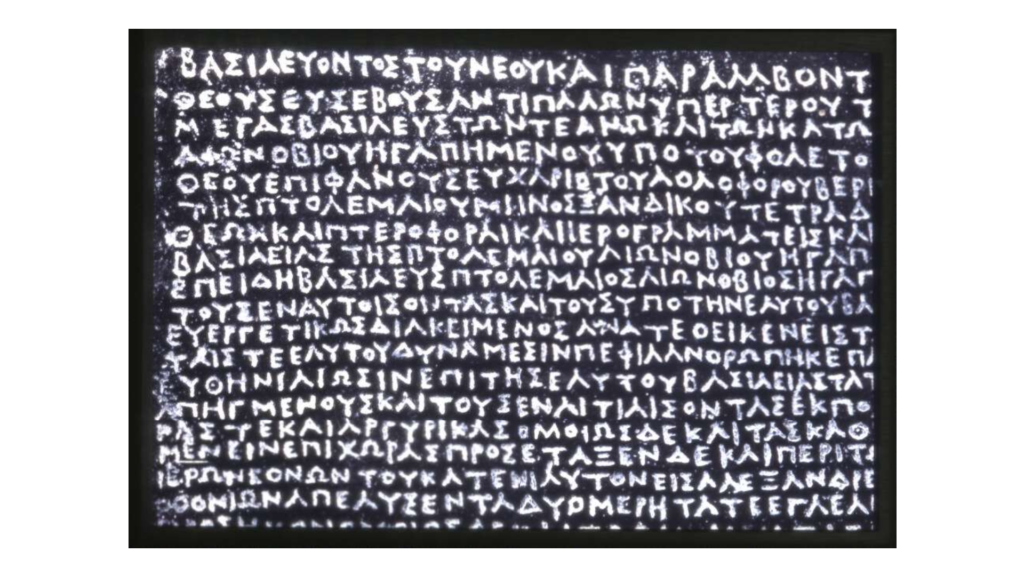
Two hundred years ago, nobody knew how to read hieroglyphs. Even Egyptians had forgotten the meaning of those strange symbols written and chiselled by their ancestors.
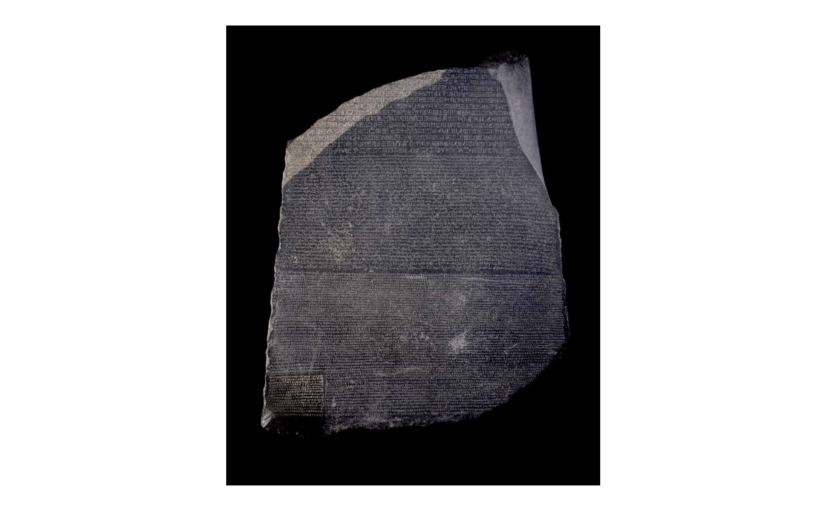
A French man called Jean-Francois Champollion was the first to crack the code of hieroglyphs. The key was the Rosetta Stone, which contained the same message written in three different languages, including hieroglyphs. Jean-Francois used the language he did know (Greek) to decipher the one he didn’t (hieroglyphs).
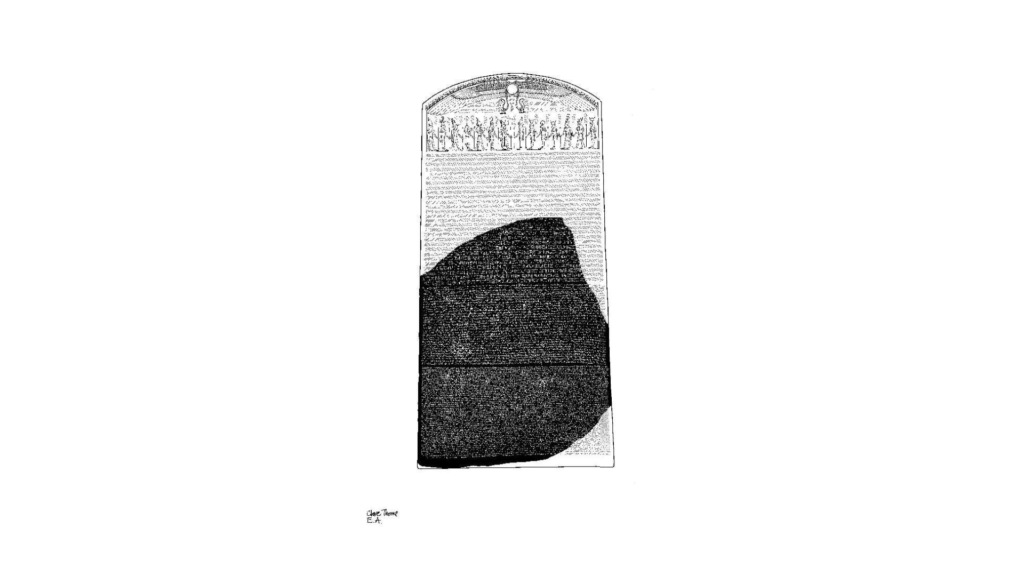
The Rosetta Stone found in Rashid, Egypt, was part of a bigger stoneThe top part of the Rosetta stone was Egyptian hieroglyphs. The middle part was Demotic (another Egyptian script)The bottom part (above) was ancient Greek
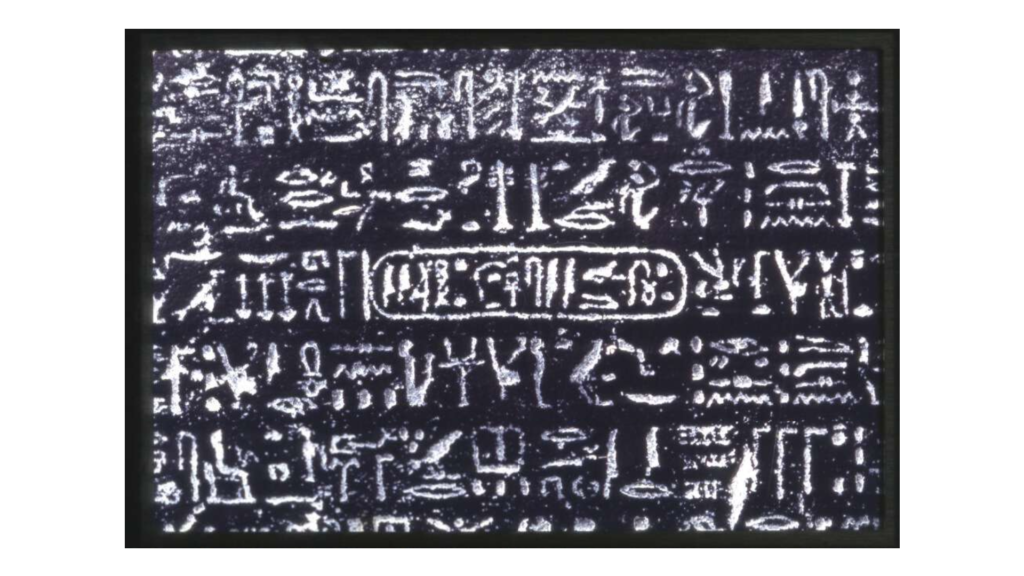
Champollion worked out that the easiest bits to translate would be the names. Names were written inside a special protective loop called a ‘cartouche’.
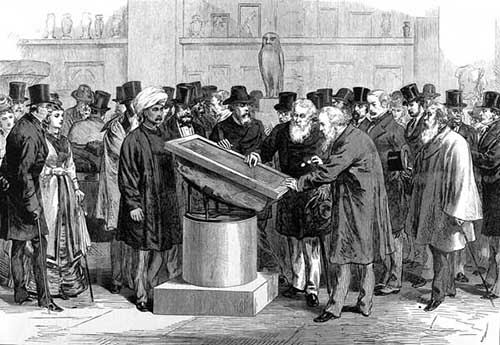
Experts inspecting the Rosetta Stone in 1874 at the British Museum
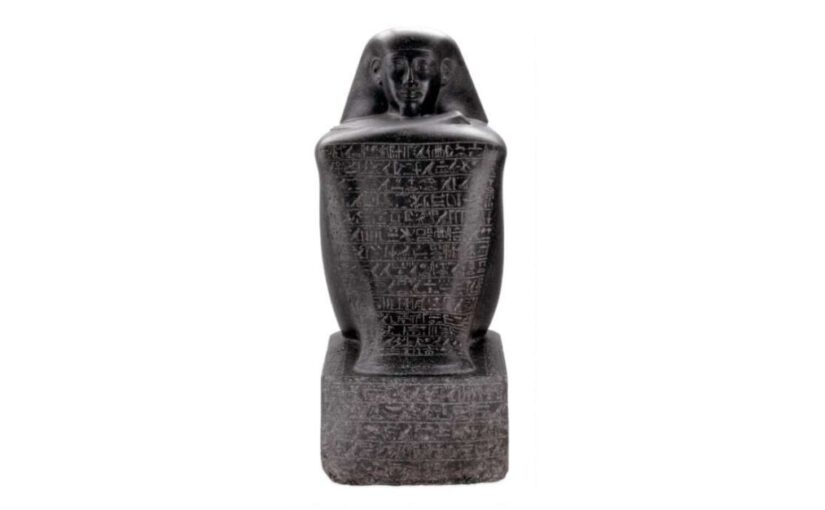
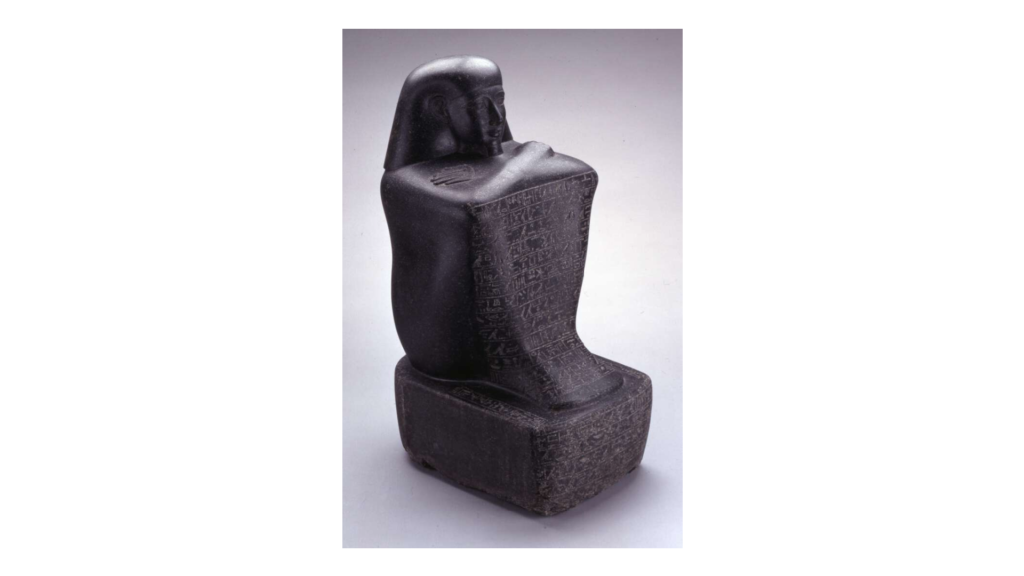
This block statue of Sennefer came from a temple on the west bank of the River Nile. It is one of the most handsome block statues ever made by the Ancient Egyptians. Look how finely carved and polished Sennefer’s face and hands are.
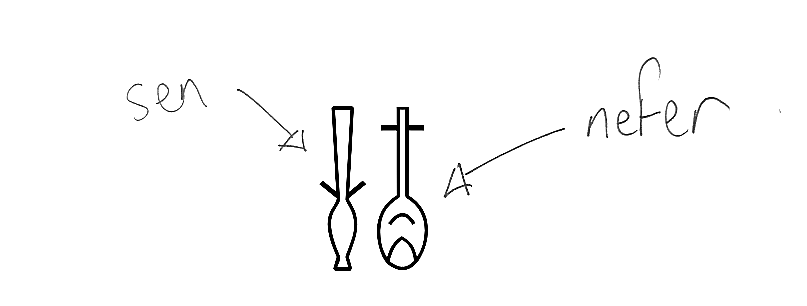
Sennefer was the mayor of Thebes during the reign of the pharaoh Thutmose III. His name was written with just two hieroglyphs, like this:
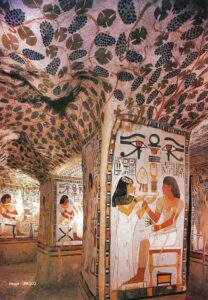
Sennefer was buried in a stunning tomb with beautifully painted walls. If you go to Thebes in southern Egypt, you can visit it for yourself.
Here is a painting of Sennefer’s wife presenting him with symbols of life and power. Can you spot Sennefer’s name among the hieroglyphic writing in this painting?
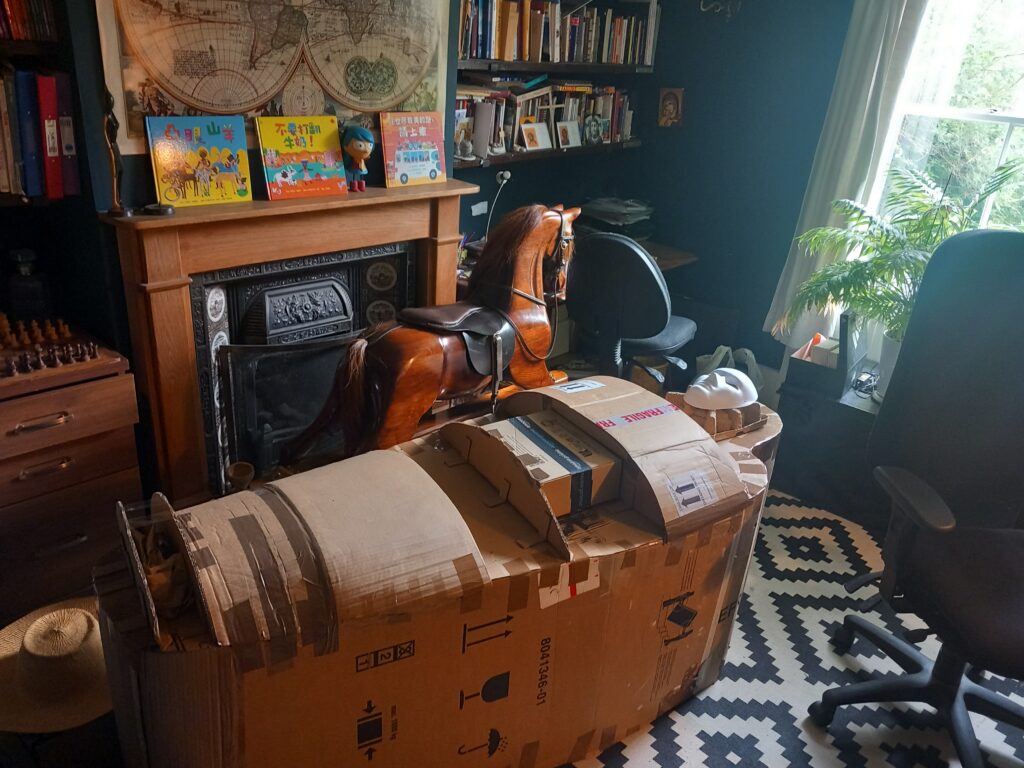
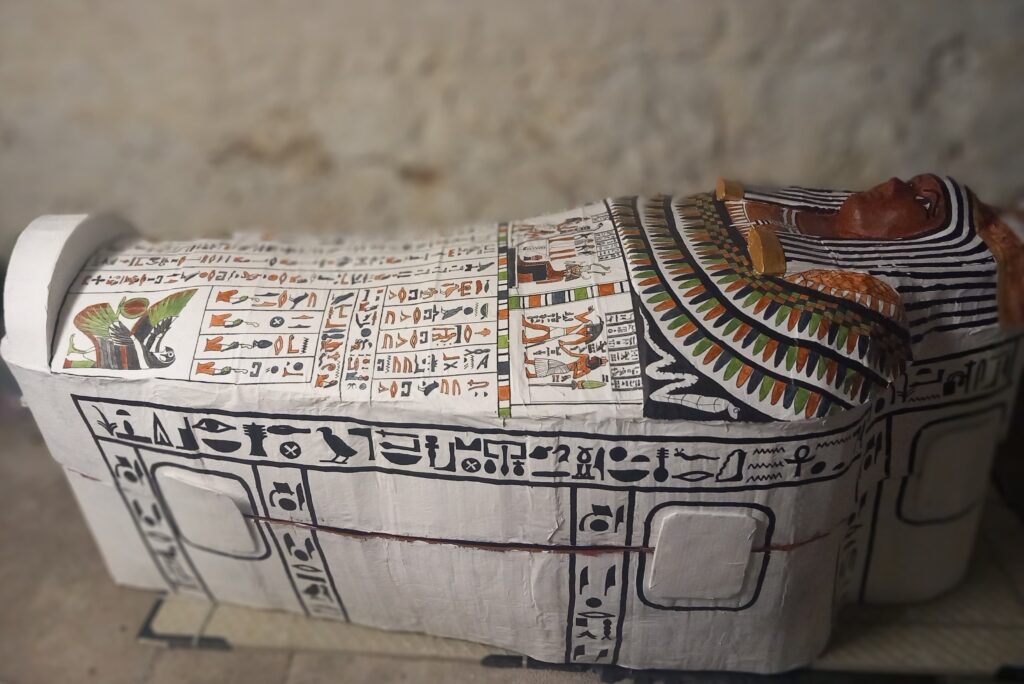
For a fun project over the summer, I had a go at making an ancient Egyptian coffin out of cardboard and papier-mâché. I know papier-mâché isn’t the most relaxing of classroom activities but when I do it at home with an audiobook playing in the background, I find it extremely therapeutic. Maybe a project of this size is feasible in Year 3 or Year 4 if a group of fifteen or so children team up and spread the work across several afternoons.
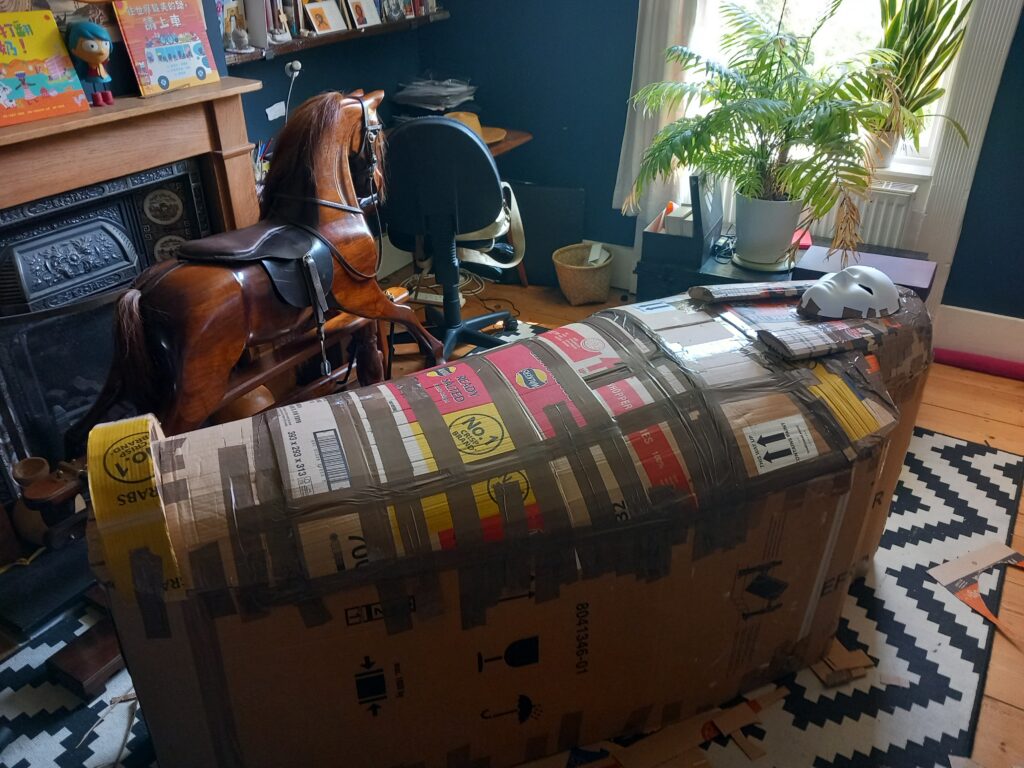
You can get free fridge-freezer-sized cardboard boxes from any white goods company – the ones I approached were glad to be shot of them. I used a roll of packing tape to assemble the cardboard ‘carcass’ of the coffin, and cut out eight curved panels on top to provide the shape of the body. As for the face, you can buy a paper mask from Hobbycraft or similar.
I messed up here – the cardboard hair-piece should curve up over the brow instead of sitting flat. Otherwise I was pleased with the coffin’s shape.
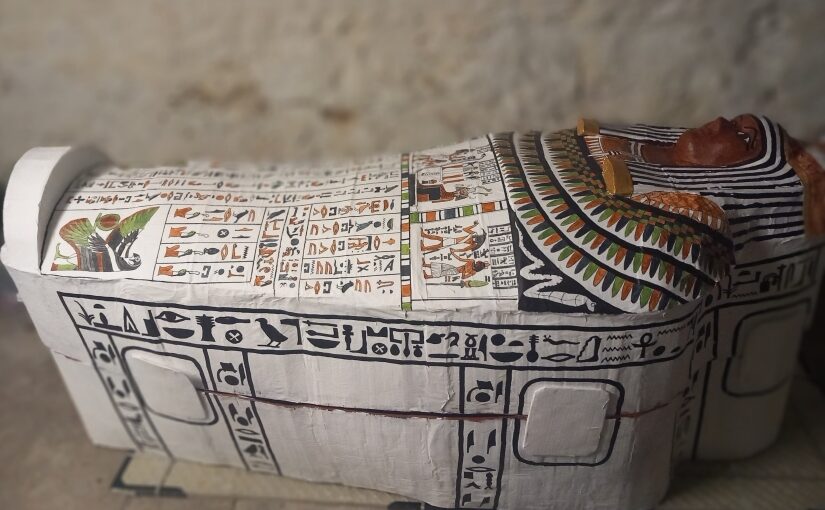
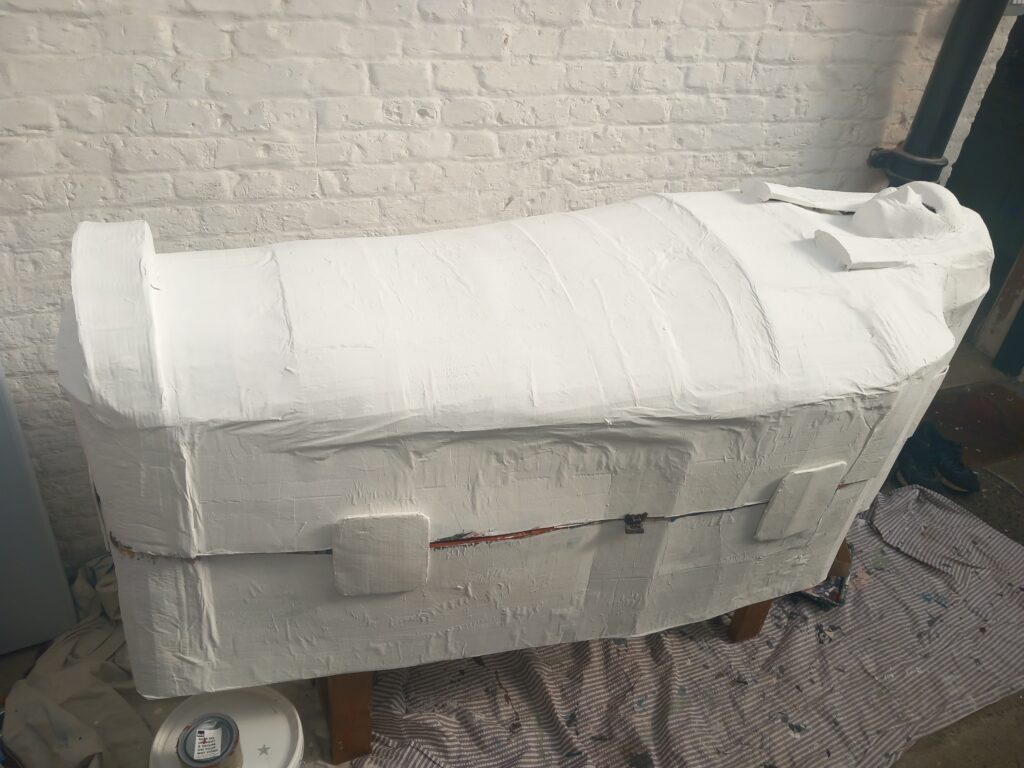
Two layers of papier-mâché followed by two coats of white emulsion. Once it was dry, I slit it horizontally with a craft knife to divide the coffin into top and bottom sections. Because the two halves were originally one piece, they fit together perfectly.
Use Posca pens or similar to draw rectangular panels for the artwork and hieroglyphs.
I used acrylic paints (Shuttle Art vintage paints) for the picture panels and hieroglyphs. A limited palette is probably best. I stuck to dark blue, sage green and ‘Mars’ orange, to imitate the real coffin of Pensenhor.
Finally, I added two coats of Polyvine ‘clear satin’ varnish, for protection. I wish I had chosen a flat varnish – the face in particular has ended up too shiny.
I’m using the finished coffin as a prop for an escape room and as a visual aid for online Egypt-themed author visits. Book me for an author visit through Authors Abroad to meet Pensenhor for yourself and to enjoy a special Night in the Museum writing workshop.